
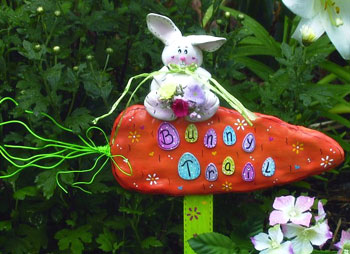
Bunny Trail
Designer - Dimples - Marshfield, VT
Click for larger pattern view
Materials:
, Green, Baby Pink, Spice Pink, Cadmium Yellow, Salem Blue, Summer Lilac
- 16 ounces of Creative Paperclay® modeling material
- 2 large and 8 small eggs Forster Halloween Woodsies
- Deco Art Americana Acrylic Paints: Snow White, Buttermilk, Pumpkin, Yellow
Deco Art DAS-13 Acrylic Spray Sealer, Matte Toner FunWire: Jelly Bean Green, six 6” pieces of 18 gauge, 12” of 22 gauge Pink E bead (nose) Assorted mini silk flowers two 10” pieces of Lt. Green Straw Satin Raffia Paint mixing stick Paintbrushes: #6 & #10 shader, #0 liner 3 ½” x 9” of copy paper Black Identi-Pen Beacon Adhesives Kids Choice Glue Plastic Wrap or waxed paper Rolling pin Plastic knife Fine sandpaper Paper towel Stylus Scissors Non-stick baking sheet Oven - preheated to 250 degrees

Procedure:
1. Fold paper in half side to side, cut out carrot as illustrated. Open pattern. If additional trimming is required, refold pattern and trim as desired.
2. Line smooth clean work surface with waxed paper. Roll Creative Paperclay® modeling material evenly until ½” thick. Center pattern on clay and cut around edges with a plastic knife. Remove pattern and scraps. Smooth and round edges of carrot with fingers then press thumb randomly into front and side edges.
3. From scraps, make one 1” ball (head), one 2” ball (body), two 5/8” balls (ears), two ½” balls (front paws), two ¾” balls (feet). Shape body parts as illustrated.
4. Refer to photo for position and placement. Press pieces together carefully but firmly. Overlap Bunny’s body on top edge of carrot, then attach head, feet, ears and front paws as pictured. Insert ends of 18 gauge wires in carrot.
5. Bake on non-stick baking sheet in preheated 250 degrees oven till dry. Approximately 45 minutes. If still moist, let stand in oven set on “Off”. When dry, remove from oven and let cool. Sand if needed. Wipe off dust with paper towel.
6. Apply two coats of paint and allow it to dry between each coat. Paint as follows: Carrot with Pumpkin. Paint the stick with Yellow Green and the bunny with Buttermilk. Blend Snow White with colors to paint wooden eggs as pictured.
7. Dry brush cheeks, center ears and bottom of feet with Baby Pink. Use stylus to dot hearts, dots and flowers. Hearts: Make two dots side by side, drag puddles down to form a point. Flowers: Make dot in center, use contrasting color to dot petal and drag outward. Draw details on bunny, eggs, carrot and paint mixing stick with extra fine point of black marker. Print letters with fine point of black marker. Spray all with acrylic sealer.
8. When sealer is dry, tie straw satin raffia around the neck in shoestring bow. Wrap 24 gauge wire around base of 18 gauge wires, bend to form shoestring bow. Glue flowers, wooden eggs and paint mixing stick in place. Let dry thoroughly.